Basic kids’ bread
The shoemaker’s children are ill-shod. I came home yesterday – no bread.
Szewc bez butów chodzi. Wróciłem wczoraj do domu – nie ma chleba.
Luckily, I have a backup recipe for such situations. A couple months ago I got a book: “The Children’s Book of Baking Bread” by Abigail Wheatley and Sam Baer (sources). It’s been published in a very handy way (spiral-bound), also, the layout is simple and clear, and the recipes have small illustrations for most steps, which helps when working with a small illiterate. The units in ingredients are both metric (thank you!) and imperial, with a teaspoon here an there.

You can bake in a tin or proof in a basket
We’ve only done one recipe from it, and it’s simple enough to do some variations to it. I think the rest just waits for the Kids to pick it up.
It is a basic white loaf, with an option to change flour to wholemeal. The first time we did it (with Helenka), we split the dough in half, added sesame to one bit, and cocoa powder to the other. Then we put one on the other and made a swirl. I may repeat it to make more photos.
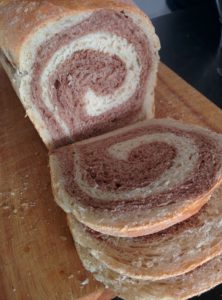
Swirl variation of the basic bread
Helenka is quite creative in general.
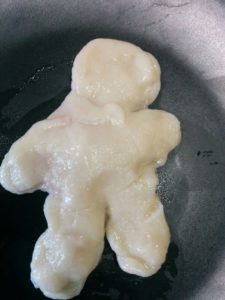
Dumpling-man, anyone?
Back to the bread. This time I decided to try wholemeal flour. The recipe suggested replacing it completely, I went with 70% wholemeal strong, 30% strong, as I feared it would come out too dense.
Ingredients
Makes a loaf or 12 rolls
- 350 g wholemeal wheat flour
- 150 g strong wheat flour
- 325 g water (hand-warm)
- 40 g butter (rather soft)
- 1 teaspoon dry yeast
- 1 teaspoon salt
As you’ll see, I did two servings. I decided to make bread for breakfast and rolls for the supper.
Preparation
Hand-mix all the ingredients, or if you’re in a hurry, let your mixer do the job
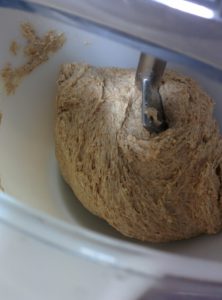
Dough in the mixer
Leave the dough for 50 minutes. I folded it once, after about 35 minutes. It feels nice and soft.
Shape the dough:
bread: I stretch the dough flat, roll it into a swirl, then roll it with hands into a thick stripe, which I roll into a swirl again. Then I just roll it with hands again to match the length of a loaf tin. It’s about 25-26 cm in my case. After such process you can feel the dough is well stretched and springy. Also, the shape is way more regular. If you notice that the dough starts tearing at any point, give it a minute rest to regain plasticity. It will also help the dough hold shape afterwards. Put the load into a tin and cut it with a knife (If all is well, the loaf will not crack elsewhere when baked)
rolls: divide the dough in 12 more or less equal bits (about 70-75 g each), round them. I also took a wooden spoon and split some of them with the handle.
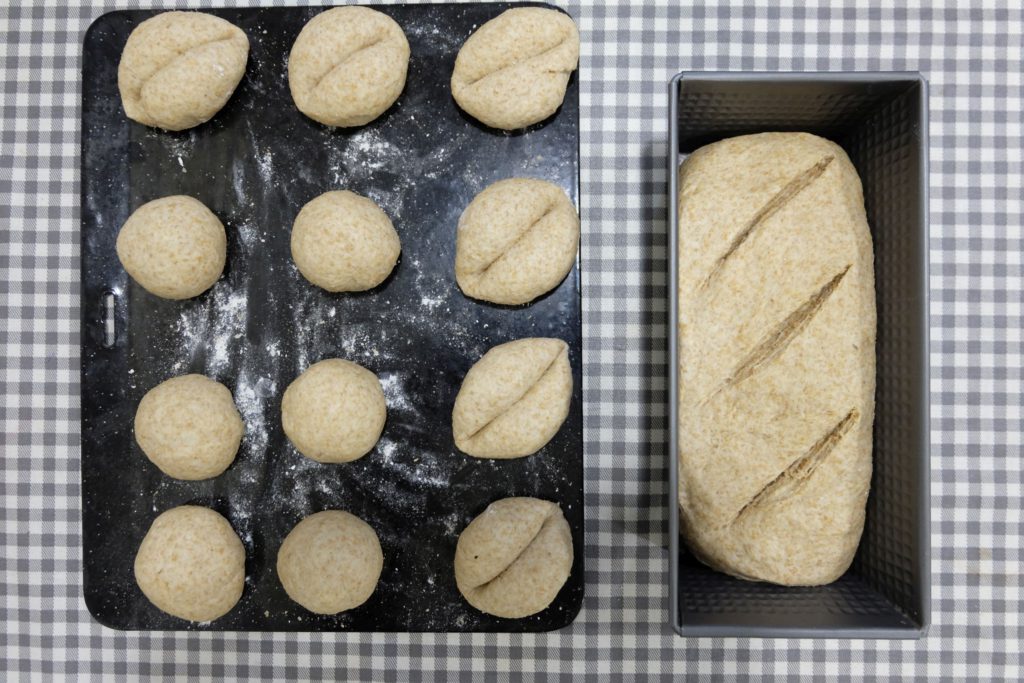
Formed dough and rolls
Leave the bread/rolls for about 30 minutes. Set your oven to 180C (the recipe says 220C, but my oven tends to burn things when the temperatures are as high as the recipe says, if something is to be baked for over 10 minutes). Put water in a oven-safe dish at the bottom. Know your oven
Put the dough into the oven. This time I covered it with kitchen foil to reflect the heat radiating from the heating elements. I baked the rolls for about 15-20 minutes (without the foil at the end). The bread needed 25-30 minutes.
Let it cool down before eating. The crust may be a bit hard straight out of the oven, but it will improve. The steam escaping the inside of the loaf softens it, stabilising the whole loaf’s humidity. If you cut a hot roll, it will be very humid inside, and will quickly begin to crumble.

Simple kids bread – the crumb
That’s it. I started at 5 p.m., we started eating the rolls at 8 p.m. The ones with a split were good to eat earlier. Next time I will try 100% wholemeal.