St. Martin’s croissants. Rogale Świętomarcińskie.

11th of November is coming, and this is St. Martin’s Day. Time to prepare a special treat: St. Martin’s croissants.
11 Listopada zbliża się, a z nim Dzień Świętego Marcina. Czas przygotować coś wyjątkowego: Rogale Świętomarcińskie.
Poznań – a beautiful Polish city, has its traditions. One of them is its patron saint’s day. Having Saint Martin’s croissants is part of the celebration and in the old days it was the only chance to enjoy these delicacies.
The croissant is made with Danish pastry, white poppy based filling, coated with icing and covered with almonds. I wanted to make them before and now seemed like the best time to try.
Since I have never made croissants before, I had to do some trials: I found the recipe to try, made the Danish pastry, rolled some croissants, kept watching videos about them. While the final shape is in most cases far from ideal, I am very happy with it. Interestingly, I think they taste better on second day then on the first.

Saint Martin croissant
The recipe comes from ArtKulinaria blog (sources). I made the same amounts, but now think that half of the dough serving is much easier to handle, so I recommend either making 12 croissants (half of the quantities provided) or splitting the dough in two halves when starting to laminate it. It cools down faster, is easier to roll and one half can wait in the fridge when you’re preparing the other.
Planning
I recommend preparing the dough and the filling the day before you make the croissants. This will leave you with much less work on the last day.
Preparing the dough takes about 2-2.5 hours, preparing the filling – about 2 hours together with all the waiting. The dough requires some discipline with timing, the filling does not and you can extend the breaks and spread the preparation as you wish.
Tools
You will need a couple things. I’m (of course) using a kitchen robot to make my life easier.
Filling
- a rather large saucepan (the poppy expands when cooked)
- a very fine strainer or a strainer and a gauze
- two bowls
- a grinder for grinding the poppy seeds (they are also referred to as meat grinders)
The dough
- two mixer bowls: for whisking the eggs and for making the dough (I could go with one, but I have two, and it makes things easier)
- a bowl for the yeast starter
- a pan to warm the milk up. I also used a thermometer to get it to 37-40 C
- a small pan to melt the butter
- a bowl for a frozen butter. Hint: grated frozen butter takes up way way more space than in packaging; make it a rather big one. A soup bowl will fit 150 g of butter, so you’ll need two
- a rolling pin
- two baking trays lined with baking paper (for 12 croissants)
- a small plate for the salt (measure it before to not have to remember later)
- a pizza knife
- a sieve
- a grater
Ingredients
This is enough for around 24 croissants.
The filling
500 g white poppy
300 g dried sponge cake crumbs (I got some ladyfingers from the store and ground them as I had no time to make one at home)
500 g sugar (I followed the author’s advice to use 250 g sugar and 250 g honey)
85 g butter
85 g raisins
85 g nuts (I followed the author’s advice to use 100 g almonds)
2 tablespoons of orange peel (I made my own)
250 g eggs (without shells, of course), this is approximately 5 eggs
a couple drops of almond oil or extract
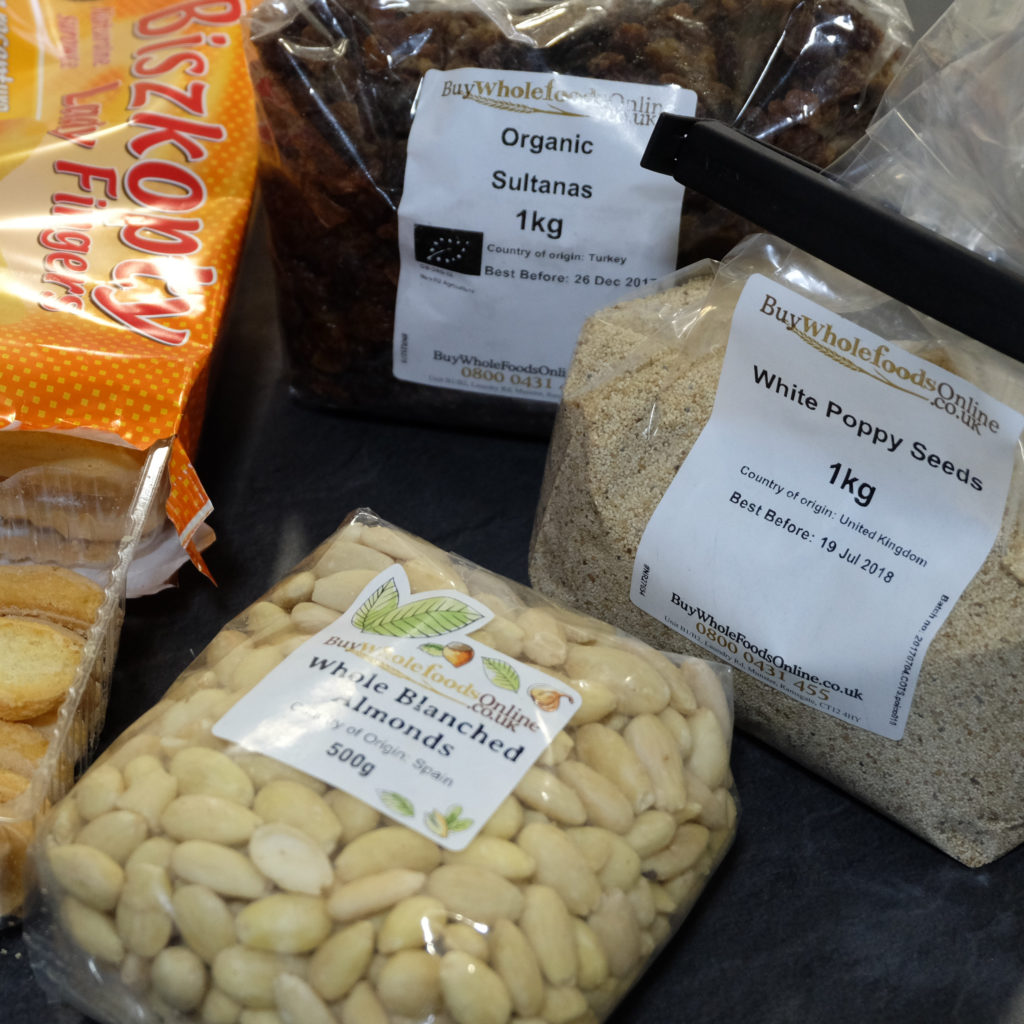
This looks like a sponsored pic, but it’s not. I just like them.
The dough
- 1000 g Plain wheat flour
- 400 ml Milk
- 120 g Sugar
- 120 g Butter
- 2.5 Eggs (two eggs and a yolk)
- 4 g Salt
- 20 g Fresh yeast
- 300 g Butter (frozen)
The icing
- 200 g icing sugar
- a few spoons of hot water
- about 100 g coarsely chopped almonds
Preparation
The filling
Before
- Blanche you almonds. I have bought already blanched ones
- Grind your almonds finely
- Grind your sponge cake finely
- Chop the raisins
- Rinse the eggs with boiling water – put them on a plate in your sink and pour a lot of freshly boiled water onto them. This is important: you will be adding raw eggs to the filling and leaving it this way until baking
Actual Recipe
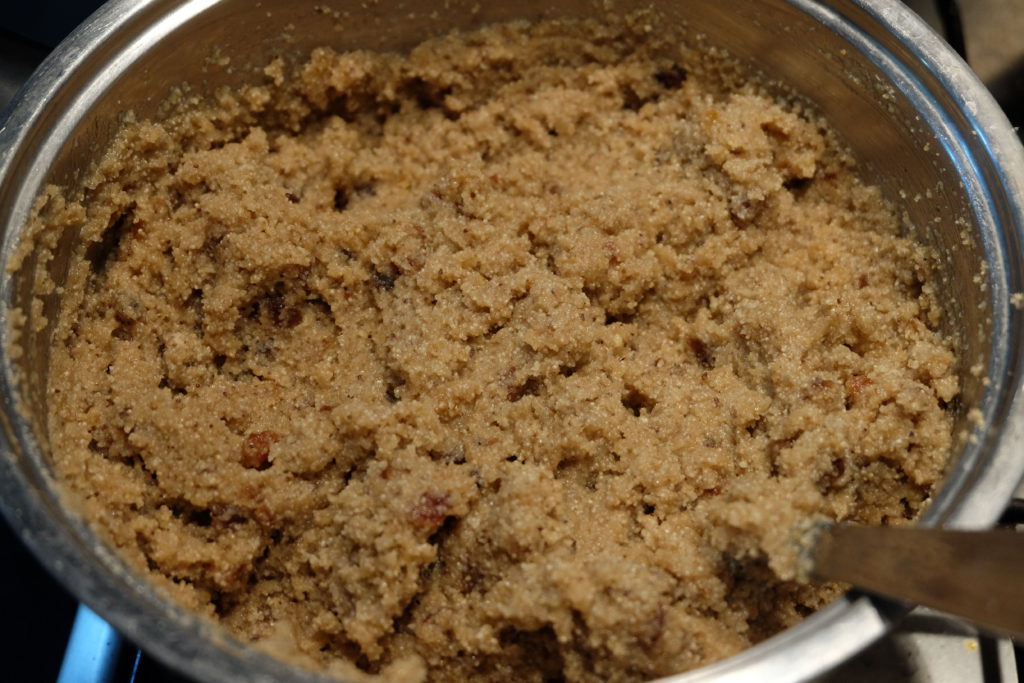
Rinse the poppy, then put in a saucepan, cover with boiling water and hold on a small heat for about 30 minutes. Stir from time to time
Remove the water form the poppy and let it cool down
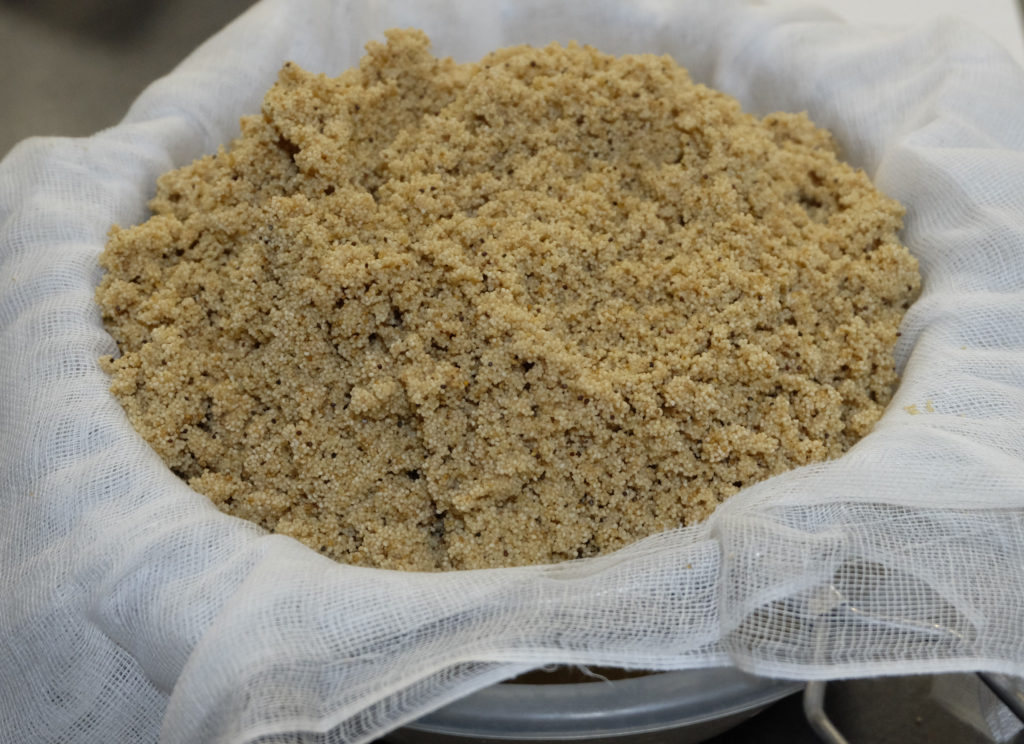
Removing water from cooked poppy
Grind it three times in a food grinder with smallest holes
Melt the butter on a low heat, add sugar and honey and dissolve into a syrup
Add chopped raisins, the orange peel and almonds. Stir it regularly for a few moments, until you can see everything soaked the syrup up a bit
Add ground poppy, mix it well and keep stirring for 5-10 minutes on a low heat. Make sure it does not burn on the bottom
Filling in the making
Let it cool down
Keep mixing the filling in a mixer now. *Note that I don’t know what word to use here, Polish “ucierać” means something like smearing on the walls of a bowl to make finer and I used mixer part with rubber feathers doing precisely that. Without it I would use a whisk beater.*Add a few drops of the almond extract and the sponge cake crumbs until they get incorporated
Start adding eggs, one by one. Do not add another egg until the previous one gets incorporated. If the filling starts getting runny, don’t add any more eggs
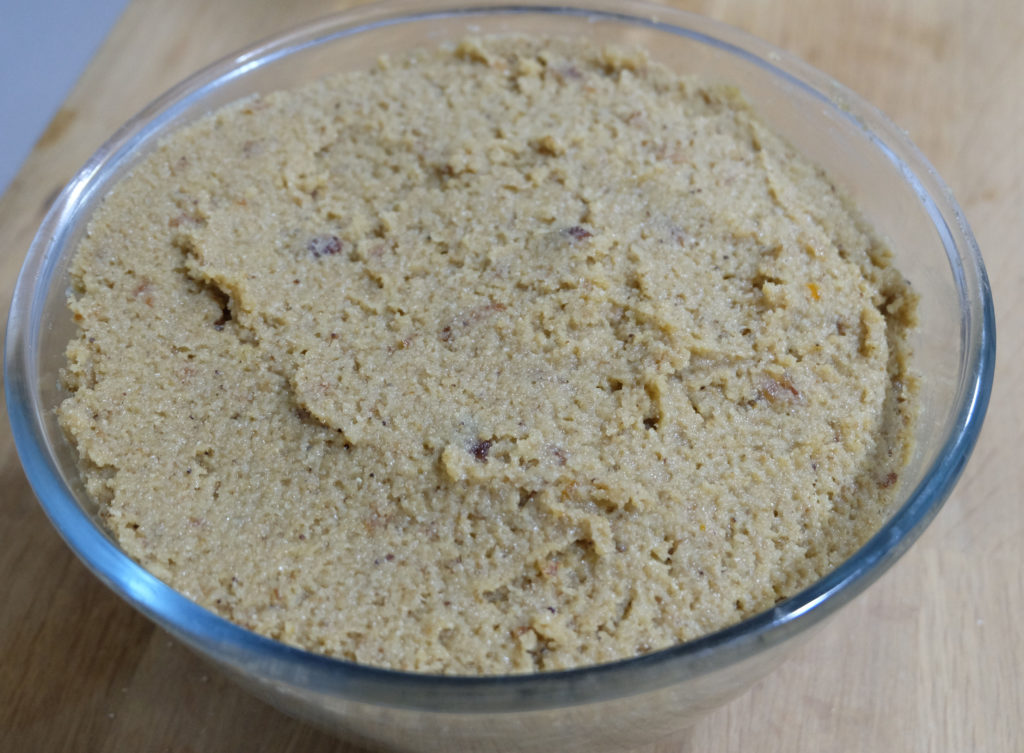
White poppy and almonds filling
I refrigerated it for the following day to make the croissants.
The dough
Get the ingredients warm before making anything. Effectively this means: make sure you have two eggs at room temperature – the butter gets melted, the milk gets warmed up. Getting the eggs from the fridge to room temperature takes about 1 hour, I recommend doing it much earlier, then you don’t have to wait
Warm the milk carefully on a small heat.
In the meantime sieve the flour into a bowlMake the starter: When the milk is at 37 C, not more than 40, crumble the yeast into a bowl and add 12 g (2 teaspoons) of sugar, then use a spoon to turn it into a paste. It will quickly get runny. Make sure most sugar dissolves.
Add 7-8 teaspoons of flour from the bowl.
Add 200 g milk and mix it all. It will be quite runny overall.
Leave this for 20 minutesIn the meantime put eggs into a bowl with 108 g of sugar and whisk it. I used a mixer, you can use a blender.
In the meantime melt 120 g of butter and then leave it to cool down
By now the starter should be ready. Start a mixer with flour. I used a dough hook for this. Add the starter. Add the whisked eggs. Add remaining milk. Add salt. Remember salt. Salt is very important. Salt is essential. Salt is key. OK, I’m exaggerating, just don’t forget about it, the dough won’t work without it
When the dough is all well mixed and you can clearly see the gluten working well, start adding the melted butter bit by bit. I add in more or less 20 g batches and wait in between until it is fully incorporated in the dough
Take the dough out and knead it for a bit. It is warm, stretchy, very pleasant. Does not stick to the surface. I really just form a ball with it and put it into a bowl and cover to rise for 30 minutes (in my experience all the steps from point 2 until now have taken 30 minutes as well)
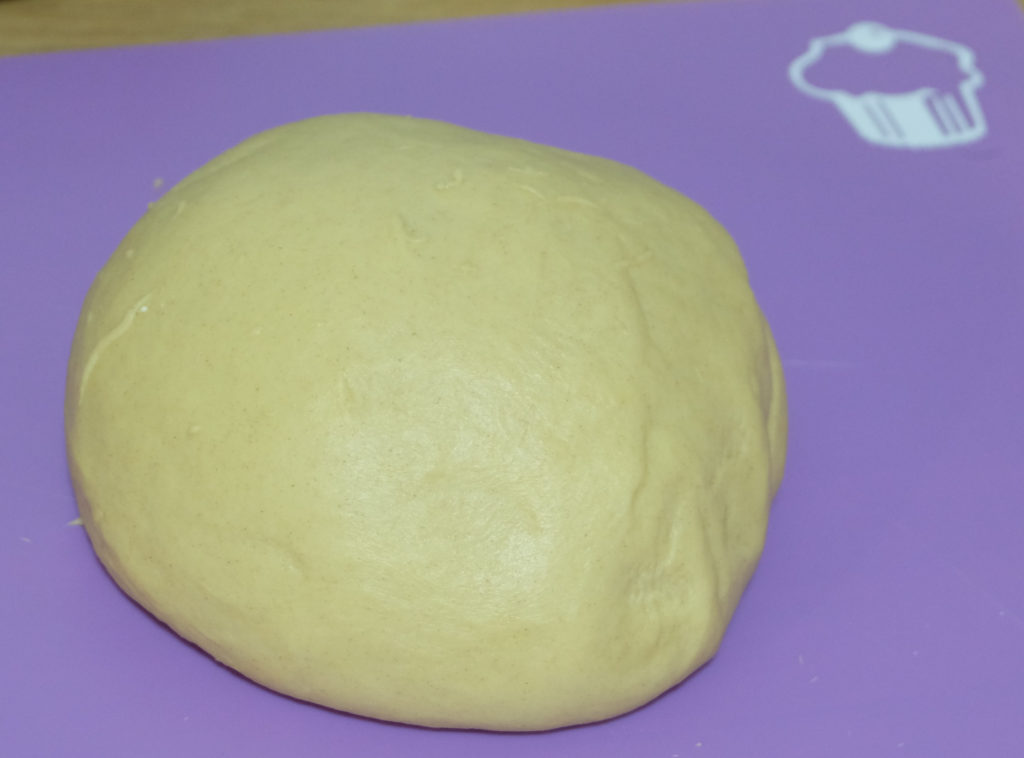
The dough should be nice, soft and stretchy
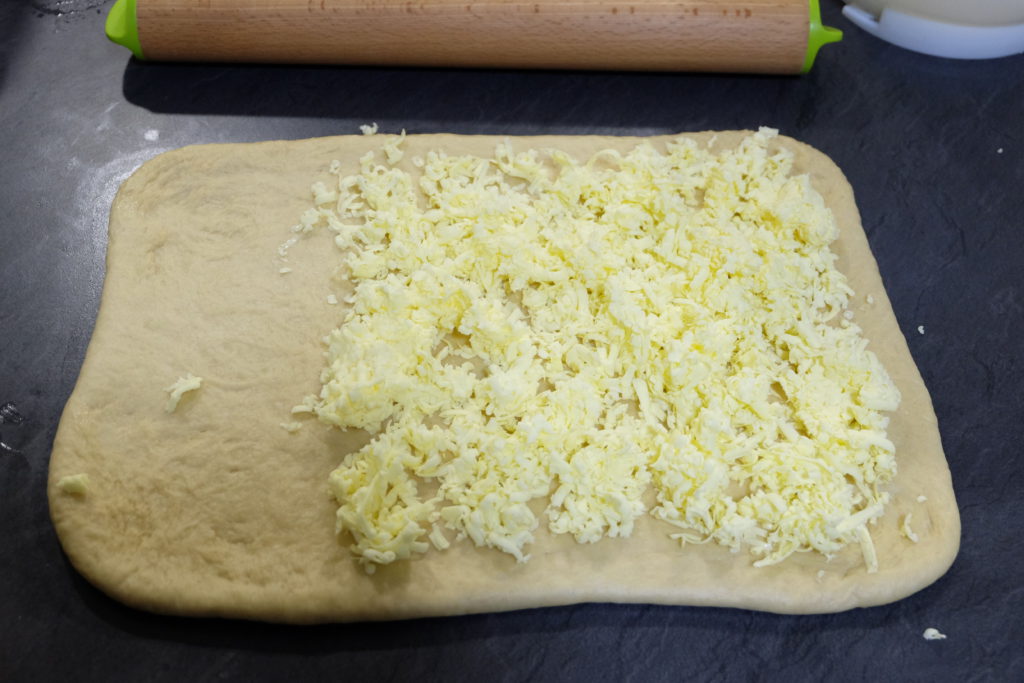
Grate the 300 g of frozen butter and put it in a fridge
When the dough is ready, take it out of the bowl, knock the air out and knead a little bit. Use a rolling pin to form a rectangle. Mine was about 45 x 30 cm
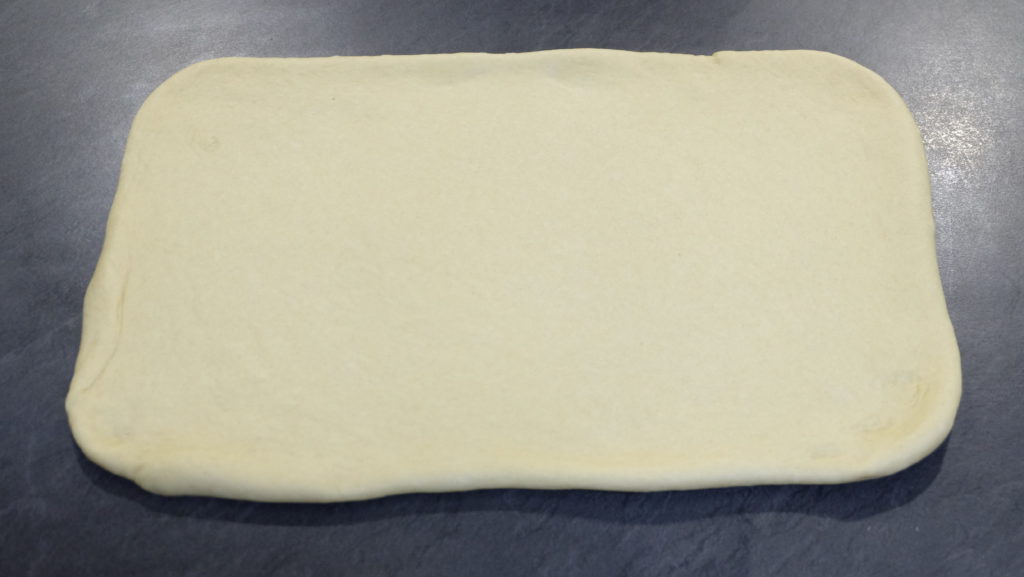
The dough ready for the butter
Put the grated butter on a 30 x 30 cm surface, leave a 30 x 15 cm side aside. Fold the clean wing inside, make sure to match the parts’s edges. Then fold it again to form three layers. When folding, try your best to make equal rectangles
Here’s butter on the dough
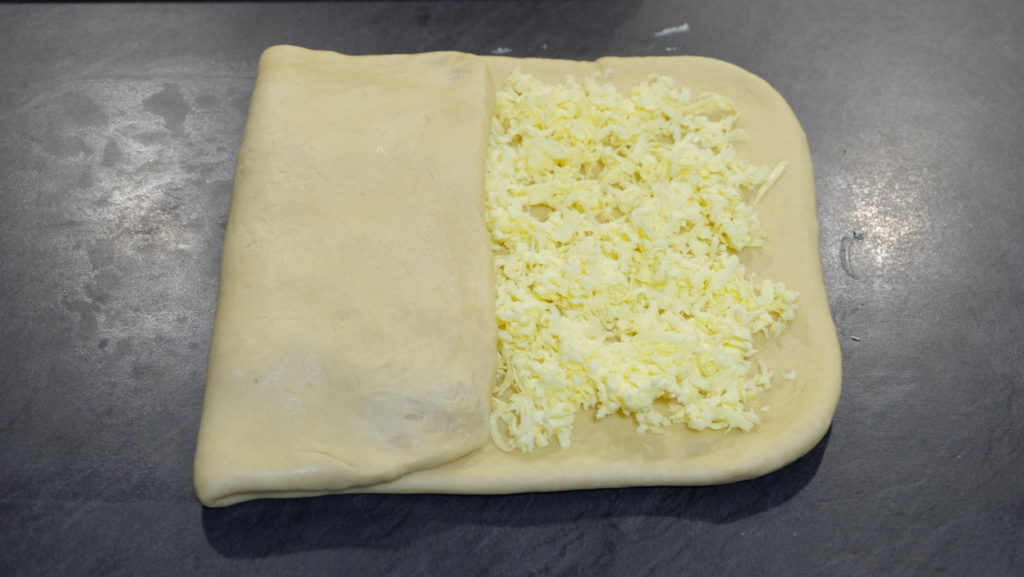
Folding the dough
Roll it flat and fold again in three (nine layers)
Roll it a bit more, wrap in cling film and refrigerate for 30 minutes
Take it out, roll, fold in three (twenty seven layers), roll it a bit more, wrap in cling film and refrigerate for 30 minutes
Take it out, roll, fold in three (eighty one layers), roll it a bit more, wrap in cling film and refrigerate for at least 30 minutes.
This is an important moment. By now you have spent about 2-2.5 hours from making a starter to preparing the dough. You can pick it up after the mentioned 30 minutes and use it or give it more time, up to 24 hours (I read somewhere). In my case I made a break to put the kids to bed and then got back to making the croissantsTake the dough out of the fridge
Set the oven to 180-190 C
Roll the dough into a rectangle, about 5 mm thick. It’s more of a trapezium (to make the edge croissants easier to make). Make sure you don’t go over 30 cm in height of the trapezium (not enough width then). Add a bit of flour under the dough before rolling, it will make the whole process much easier. When ready, cut off a tiny strip on each end of dough to expose the layers (this will make the first and last croissant look awesome)
I marked six sections on each side of the dough and cut out triangles using the pizza knife
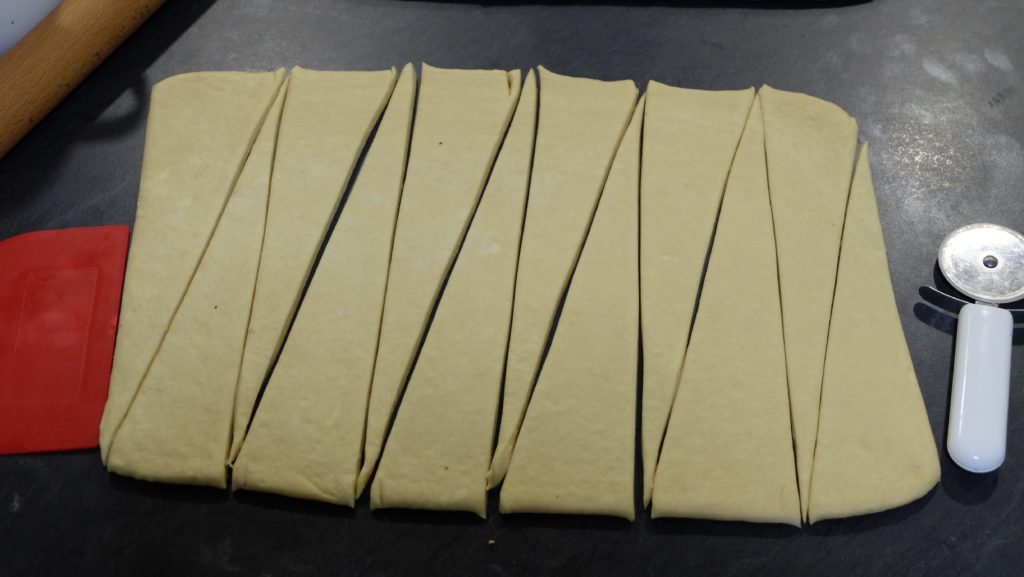
Cut out triangles
Take each triangle, put the filling on, fold about 4-5 cm of the base inside and make about a 3-4 cm cut in the middle
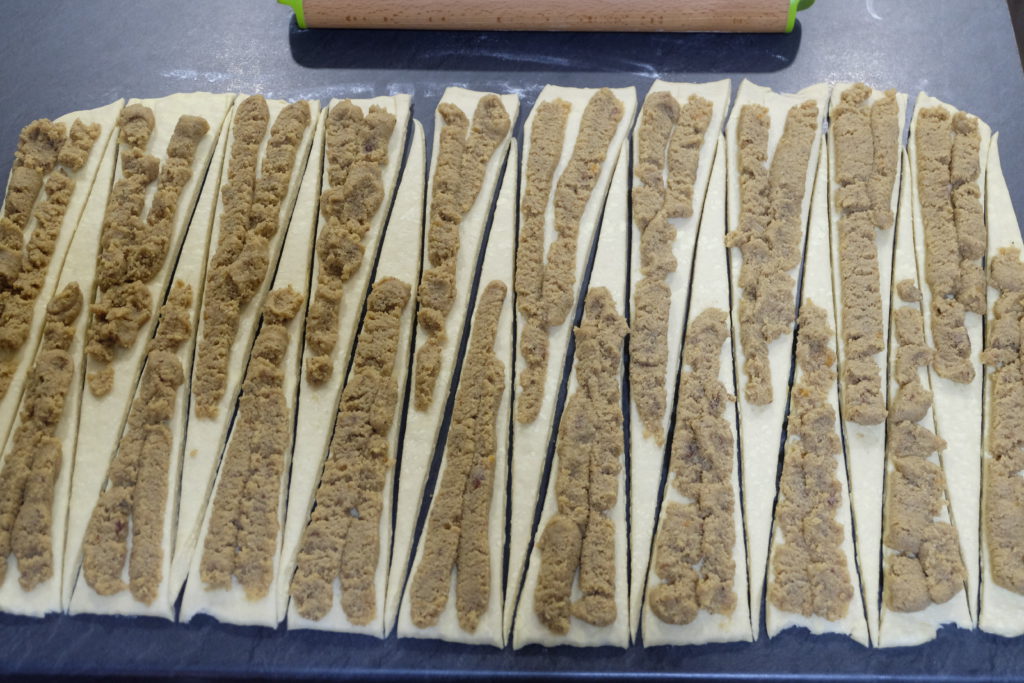
With the filling
Expand the two parts of the cut outward (This way you get a lot of filling in the ends of the croissant) and roll it. Then round it a little bit to a moon-like shape
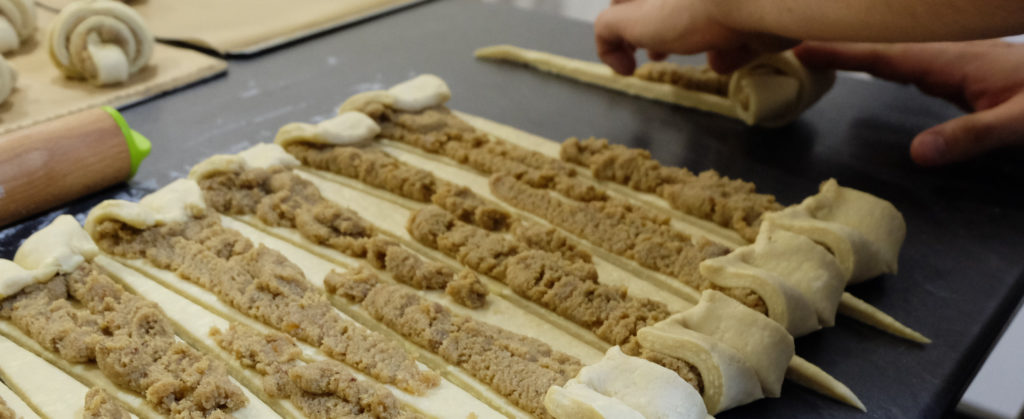
Folding the ends, rolling
Place on a baking tray and leave for 30 minutes to rise
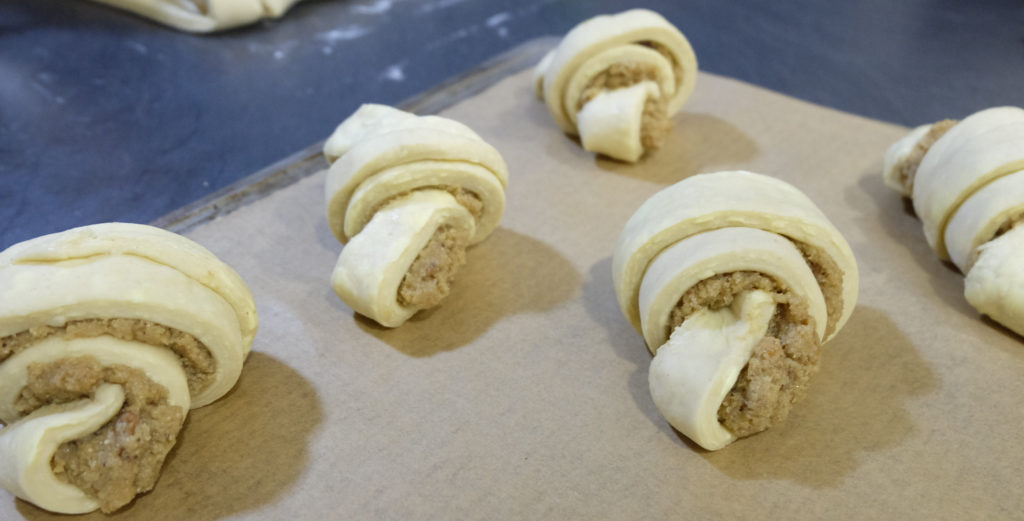
Final rise
Brush it with water and bake for 20 minutes
Prepare the icing now: putt the icing sugar into a bowl, add hot water spoon by spoon and before each mix it. Stop adding water when the icing is still quite dense, but a bit runny
Monitor the progress, you may have to rotate the trays a little bit for an even colour
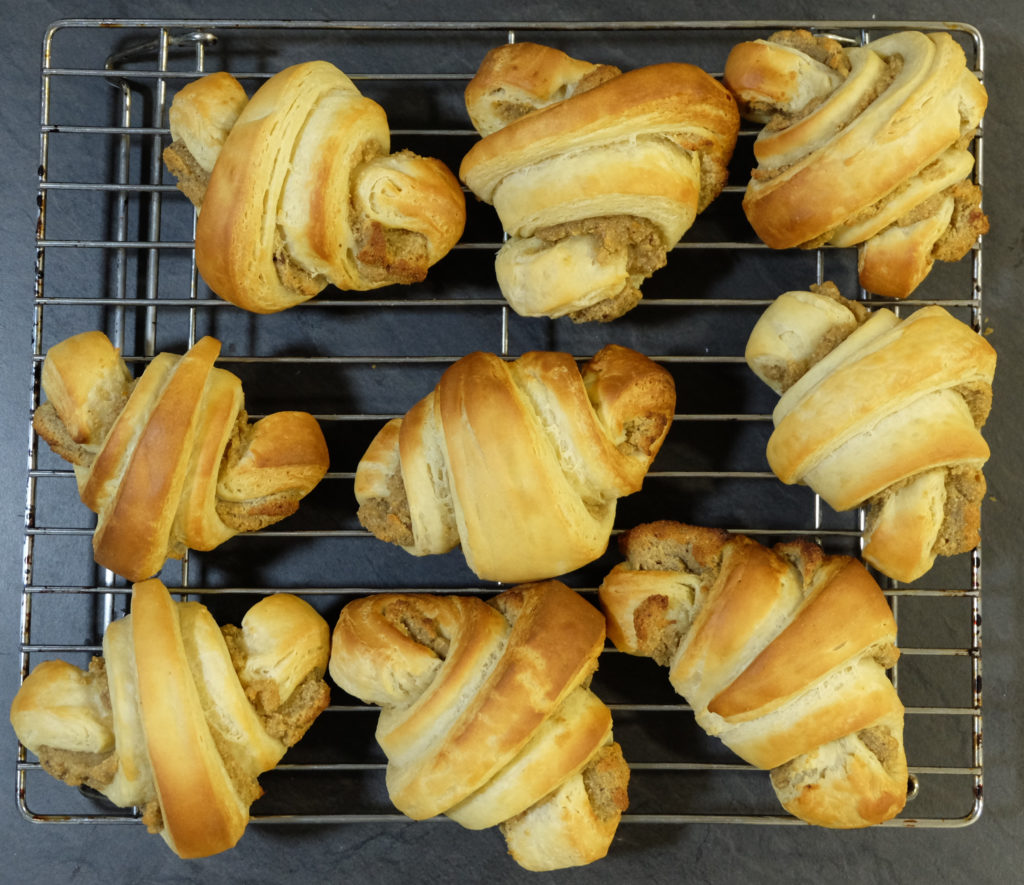
Saint Martin croissants
After taking them out, coat each croissant with icing and quickly sprinkle almonds on top. If you give it more time, the icing will get hard quickly and won’t stick
Let the croissants cool down a little bit before eating. The filling can burn your mouth when hot.
Boy, this was a lot of work, but I am pleased with the result. I ended up making twenty croissants as I worked with the whole batch of dough and it made it difficult to handle and roll. Also, I should have made the dough rectangle wider and shorter to have shorter, but wider triangles. The shaping has a lot of space for improvements as well, but hey, I made it!
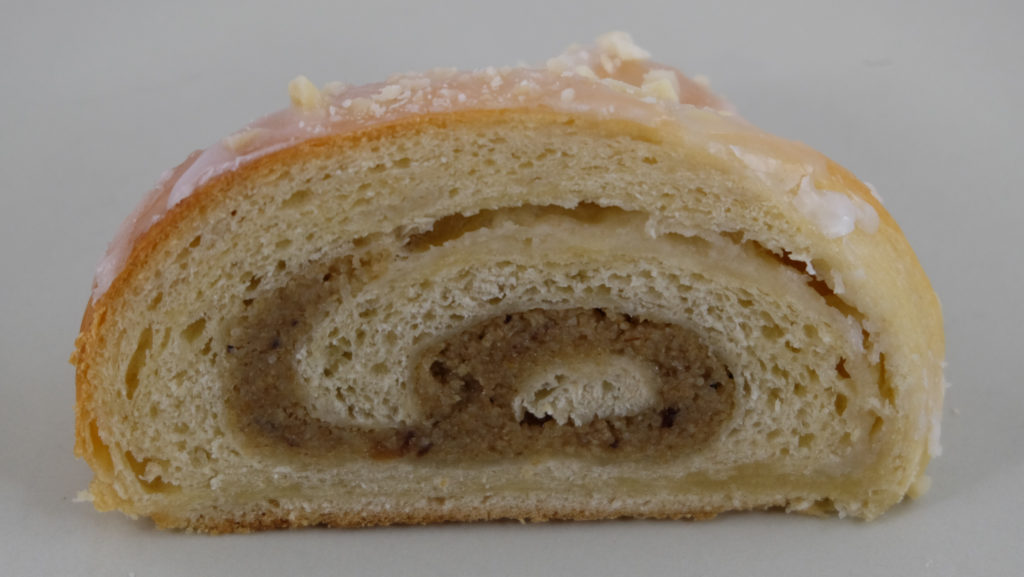
The inside
Now it’s your turn.